Spinning up the Blog

Welcome to my first post, covering the setup of this very site using Ghost.
I've been meaning to establish a place where I can record personal projects I'm working on and modifications I'm making to my home lab so here we are.
Provisioning Resources
To begin with I'll need an environment to run Ghost in, so I'll spin up a new LXC container on my Proxmox box.
I don't need to allocate a lot of resources to the CT for the time being because the blog itself isn't going to be of significant size plus I can just scale the resources later, so I'll assign 2 threads, 4 GiB of RAM, and 16 GB of storage.
IP Address
I manage the IP addresses for my VMs and CTs on the DHCP server because they're easier to manage that way, so I'll just set the CT to use DHCP.
I usually do a first run of the CT and update the OS to the latest version and then record down the MAC address to set up a static DHCP lease on the gateway.
MySQL Setup
I have a MySQL server running on my lab already so I'm going to be using that for the Ghost installation. In theory this will give better scalability, but that really doesn't matter for this blog.
Ghost expects to be able to connect to a root, or root level, SQL user so I'll need to create a temporary root user accessible from the IP address of the Ghost container.
This is as simple as executing the following from the MySQL command line on the SQL server:
CREATE USER 'root'@'GHOST_IP' IDENTIFIED BY 'some_pass';
GRANT ALL PRIVILEGES ON *.* TO 'root'@'GHOST_IP' WITH GRANT OPTION;
FLUSH PRIVILEGES;
I could improve this further by creating the database that Ghost will use here and only granting privileges for that database to the temporary Ghost user, but I'll be removing this user later, so it doesn't really matter.
Install Ghost
Now that the MySQL server is ready, and a temporary root user has been set up, the actual installation of Ghost can start using the steps outlined in Ghosts installation documentation.
I'll be skipping the first few steps of the Ghost install guide because I'm planning on implementing SSL encryption at my reverse proxy and directly connecting to Ghost, so I won't be needing a local installation of NGINX on the server.
MySQL server was set up and configured in an earlier step on a separate container to Ghost so that step of the guide is also skipped.
To start I'll need the latest LTS release of NodeJS for my distribution of Ubuntu, and to install the Ghost CLI:
# Add the NodeSource APT repository for Node 16
curl -sL https://deb.nodesource.com/setup_16.x | sudo -E bash

# Install Node.js
sudo apt install -y nodejs

# Install the Ghost CLI
sudo npm install ghost-cli@latest -g
Now that the Ghost CLI is installed the directory structure needs to be created to store the ghost files to be served:
# Create directory: Change `sitename` to whatever you like
sudo mkdir -p /var/www/sitename

# Set directory owner: Replace <user> with the name of your user
sudo chown ghost-user:ghost-user /var/www/sitename

# Set the correct permissions
sudo chmod 775 /var/www/sitename

# Then navigate into it
cd /var/www/sitename
Now that's in place the Ghost install can be initiated from within the directory created in the previous step.
I start the installation ignoring the MySQL error because I'm using a dedicated host for the database, and tell the installer not to set up NGINX because it won't be needed.
All the other details are filled out as normal, with a special note that specifying 'https://' for the URL is important because browsers will block images served from sites using 'http://' for their CDN.
And we're finished right? ...not quite.
Ghost is installed and running successfully but it's currently only listening on the loopback interface (127.0.0.1), so I have to modify the 'config.production.json' file.
After that I can run 'ghost restart' from the terminal and the Ghost instance should now be resolvable over the network on port 2368, I'll add a firewall rule to limit traffic to my reverse proxy later.
Still not done...
Ghost is now listening for network connections but it's not yet resolvable via the FQDN because the reverse proxy needs to be setup to proxy traffic to the Ghost container.
Finishing Touches
Now that all the actual installation is done I just need to do some final clean-up & setup reverse proxy access to Ghost.
Reverse Proxy
I now need to set up my NGINX Proxy Manager to serve traffic to Ghost's internal port.
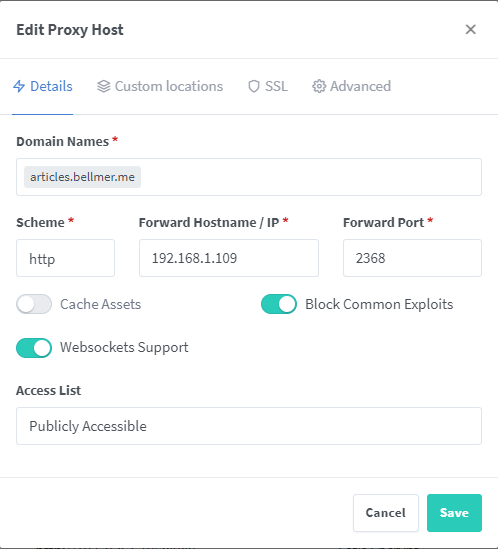
Serving the content this way removes one of the NGINX instances from the route but prevents static content serving for Ghost's resources being a possibility, but Ghost isn't configured by default to serve static content via NGINX anyway so I'm not concerned with losing this functionality.
I'll also use NGINX Proxy Manager to request a Let's Encrypt SSL certificate to secure access to the site.
Root SQL User Removal
Now that that installation has been completed I can remove the root user I created for the Ghost installer to use because Ghost sets up its own SQL user credentials.
This command has to be run locally on the MySQL server host in my case because I only have a single root level user at the moment; the default 'root'@'localhost' user.
DROP USER 'root'@'192.168.1.109';
FLUSH PRIVILEGES;
And Finally...
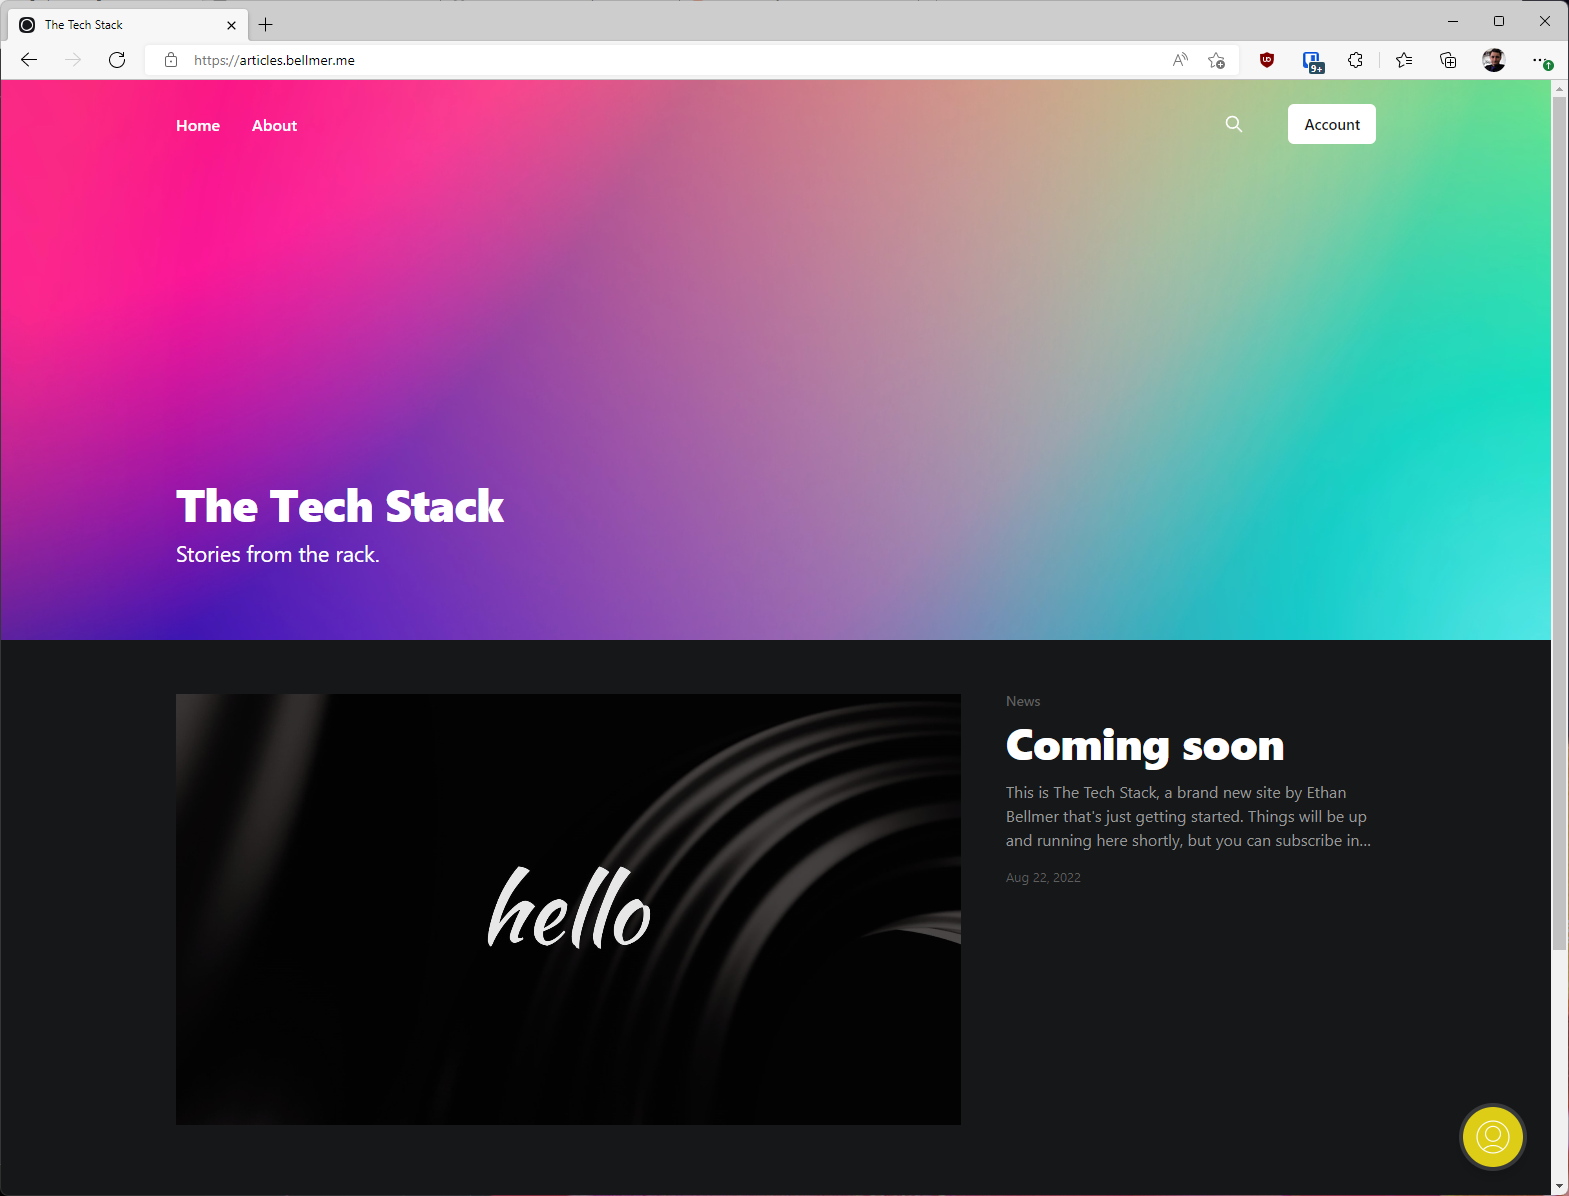
I have a publicly accessible blog site.
Thanks for reading this far. I plan on using this site to document how I expand the functionality of my home lab so I can refer back to any particular fixes or changes I needed to get a system working.
Comments ()